- 暂无内容

前言
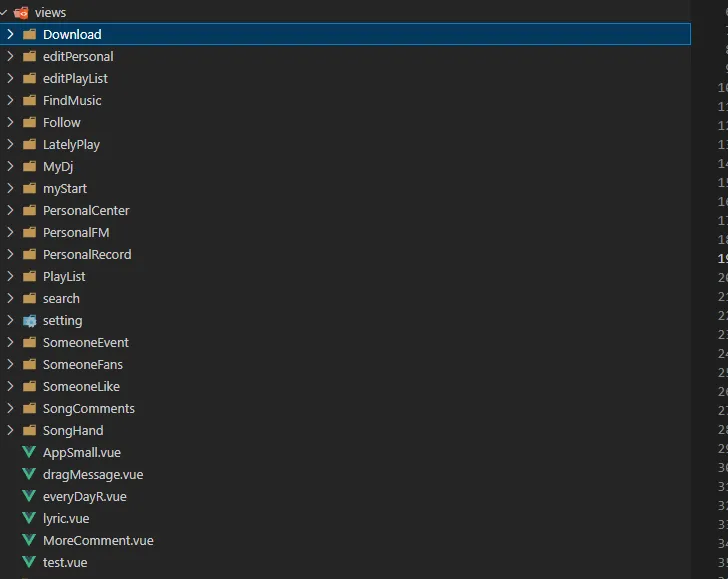
在vue项目中中,你的views文件下可能有成百上千的vue文件,此时手动注册路由是一件非常繁琐的事情。
此时可以使用vite去创建自动插入脚本
vite插件
一个 Vite 插件是一个返回对象的函数,该对象包含一系列钩子(hooks)。这些钩子可以在 Vite 构建和开发服务器的不同阶段执行自定义逻辑。
name: 插件的名称,用于调试和错误报告。config: 修改 Vite 配置。configResolved: 在 Vite 配置解析后执行。resolveId: 解析模块 ID。load: 加载模块内容。transform: 转换模块内容。buildStart: 构建开始时执行。buildEnd: 构建结束时执行。generateBundle: 生成 bundle 时执行。
使用vite插件解决问题
npm install vite-plugin-node-polyfills --save-dev
安装这个插件可以使vite导入 Node.js 内置模块来进行文件操作
修改vite.config.ts
复制代码
import { defineConfig } from 'vite'
import path from 'path'
import vue from '@vitejs/plugin-vue'
import generateRoutes from './plugins/generate-routes';
import {nodePolyfills} from 'vite-plugin-node-polyfills'
// https://vitejs.dev/config/
export default defineConfig({
  plugins: [vue(),nodePolyfills(),generateRoutes()],
  resolve: {
    alias: {
      '@': path.resolve(__dirname, './src')
    }
  },

})
接下来编写generateRoutes.ts
编写generateRoutes.ts
项目根目录下新建plugins文件夹,新建generate-routes.ts
typescript
复制代码
//generate-routes.ts
import { Plugin } from 'vite';
import fs from 'fs';
import path from 'path';

interface RouteConfig {
  path: string;
  name: string;
  component: string;
  children?: RouteConfig[];
}

function generateRoutes(dir: string, basePath = ''): RouteConfig[] {
  const routes: RouteConfig[] = [];

  const files = fs.readdirSync(dir);

  for (const file of files) {
    const fullPath = path.join(dir, file);
    const stat = fs.statSync(fullPath);

    if (stat.isDirectory()) {
      const children = generateRoutes(fullPath, `${basePath}/${file}`);
      if (children.length > 0) {
        routes.push({
          path: `${basePath}/${file}`,
          name: file,
          component: `() => import('@/views/${file}/index.vue')`,
          children
        });
      }
    } else if (stat.isFile() && file.endsWith('.vue') && !file.startsWith("index")) {
      const name = file.replace(/\.vue$/, '');
      routes.push({
        path: `${basePath}/${name}`,
        name,
        component: `() => import('@/views/${name}.vue')`
      });
    }
  }

  return routes;
}

function writeRoutesToFile(routes: RouteConfig[], filePath: string) {
  const routesString = JSON.stringify(routes, null, 2).replace(/"(\(\) => import\('.*?'\))"/g, '$1');
  const content = `export const routes = ${routesString};`;

  fs.writeFileSync(filePath, content, 'utf-8');
}

function generateRoutesPlugin(): Plugin {
  return {
    name: 'generate-routes',
    buildStart() {
      const viewsDir = path.resolve(__dirname, '../src/views');
      const routesFilePath = path.resolve(__dirname, '../src/router/routes.ts');

      const routes = generateRoutes(viewsDir);
      writeRoutesToFile(routes, routesFilePath);

      console.log('Routes generated successfully.');
    }
  };
}

export default generateRoutesPlugin;generateRoutesPlugin会在程序开始运行时执行,generateRoutes()函数通过递归检索views文件下所有的.vue文件,注册所有的index.vue与index.vue的同级文件夹下的子路由。writeRoutesToFile()函数将路由数组对象转成json保存在文件中。但是JSON.stringify方法会把动态导入的组件文件变成一个字符串这使得vue无法识别正确的动态路由,正则将所有的"import () => ('@/views/${name}.vue')"
去掉""变成import () => ('@/views/${name}.vue')
执行npm run dev后会在router文件夹下生成routes.ts文件然后在同级目录下新建index.ts文件导入生成好的路由数组
复制代码
// src/router/index.ts
import { createRouter, createWebHistory } from 'vue-router';
import { routes } from './routes';
const router = createRouter({
  history: createWebHistory(),
  routes
});

export default router;
然后就是正常的在vueApp中注册路由,不在多说明。
其他
每当你启动项目的时候,routes.ts文件都会重新根据目录重新生成。函数只包含name、path、component、children字段,如果你需要给部分路由添加其他字段(比如meta),你可以在generateRoutes函数中添加判断自行修改。